
Download the CHR VHDX image from MikroTik. https://mikrotik.com/download
Grab the latest Stable Version.
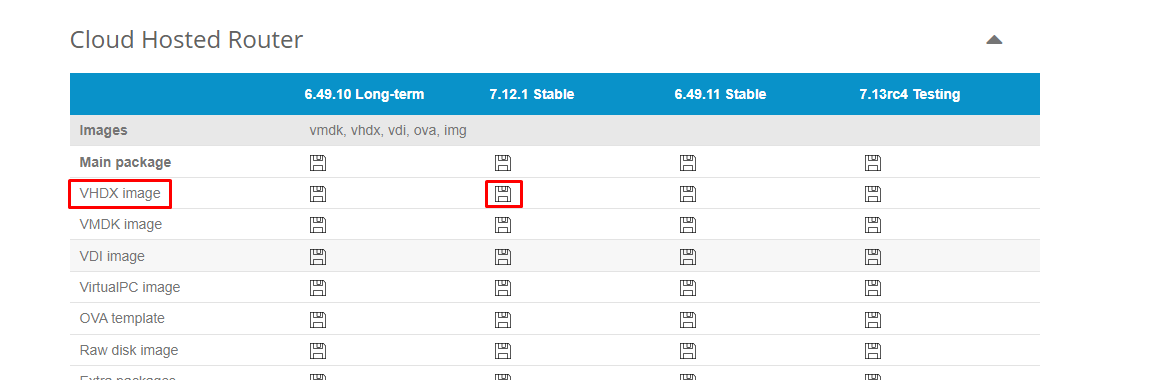
Extract the VHDX into the c:\temp folder.
Make sure that Hyper V Management Modules are installed - otherwise use a server with Hyper V.
Run the following powershell command. Note that you will need to change the filename to match according to version.
Convert-VHD -Path C:\temp\chr-7.12.1.vhdx -DestinationPath C:\temp\chr-7.12.1.vhd -VHDType Fixed
Now using the Azure CLI - create a storage account. https://azure.portal.com/#cloudshell
Change to the subscription which contains the resource group you will be using.
az account list --output-table
Copy and paste the Subscription ID from the resulting table.

Now change to that subscription
az account set --subscription [subscription_id]Now we can begin performing actions within our Resource group as follows.
First let's create a Storage Account to house the image.
az storage account create --name [name] --resource-group [resouce_group_name]
When sucessful. Lets create a container inside this storage account to house the image.
az storage container create --name imagecontainer --account-name [az_storage_account_name_from_above]Now lets upload the .vhd file you created. Note you can find account keys under Storage+Networking for the Storage account you created.
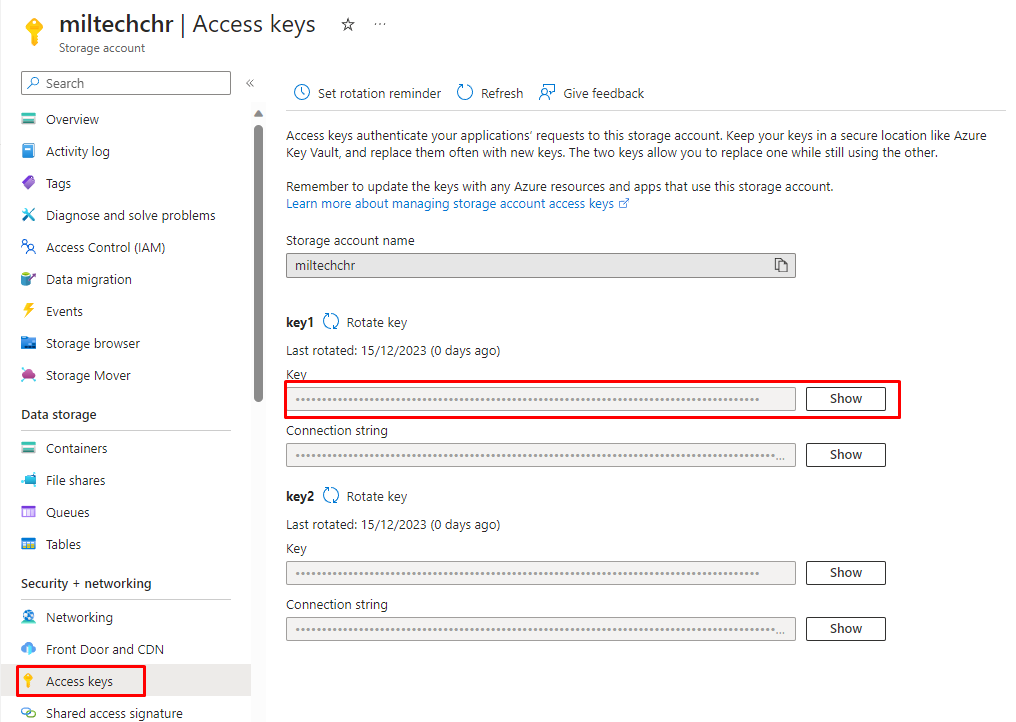
az storage blob upload --account-key [account_key] --account-name [az_storage_account_name_from_above] --container-name imagecontainer --file C:/temp/chr-7.12.1.vhd --name chr-7.12.1.vhd --type page
Next we need to convert the VHD to an OS image for use in Azure.
az image create --name chr712image --resource-group [resource_group] --location [location_name] --os-type linux --hyper-v-generation V1 --source https://[az_storage_account_name_from_above].blob.core.windows.net/imagecontainer/chr-7.12.1.vhd
Now let's deploy the VM using the image. The Standard_B1ls is a good and cheap size for this.
az vm create --name RouterOS --resource-group [resource_group] --location [location_name] --size Standard_B1ls --image chr712image --admin-username username --admin-password Password --nsg-rule SSH
Now let's restrict SSH port.

Now lets create a port rule for WinBox

You should be golden and be able to connect to WinBox from your local network.
Next we need to enable IP Forwarding to enable this VM to operate as a router between systems.
Open the Virtual Machine in Azure and get the vNIC adapter name.
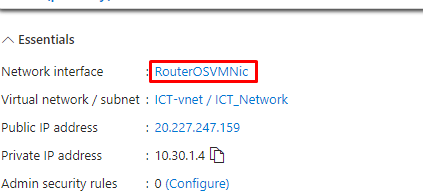
Go back to Azure CLI - and run the command to enable IP Forwarding on the vNIC.
az network nic update --resource-group [resource_group] --name [nic_name] --ip-forwarding true